Glow Word Books Blog

How To Make A Monster Costume

monster costume
Did you know that you can make a monster costume just like Lizzie did in Monsters Midnight Feast? For your costume, you’ll need:
1. Construction Paper
2. Scissors
3. Tape
4. Glue
5. Other Craft Supplies

Step 1: Make a Hat

Make a paper bandanna by cutting a few long strips of construction paper about as wide as your thumb.
Try wrapping one around your head. If it’s longer than your head it will work perfectly. If it’s shorter, you’ll have to staple a couple strips together until it’s longer than your head.
Get a piece of tape ready for the next step.
Wrap the long strip of paper around your head so it crosses your forehead and is above your ears. Once you have it fitting snugly on your head, use a piece of tape to hold the bandanna together so it doesn’t change sizes.
Carefully remove the bandanna. It should look like a big circle. Add a few staples over the tape so it doesn’t come apart.
If you have trouble getting the bandanna to be the right size, ask a friend or family member to help you. It’s easier with a second person. Congrats! You’ve finished the hardest step. Time for some fun…

Step 2: Decorate the Hat

Cut the construction paper into different shapes. Make triangles, circles, leaves, squares or any other shape you think will help you blend in with the monsters. Feel free to draw designs or pictures on them. You can even put glitter on them—just make sure it dries before you continue! All these shapes will help disguise your head from the monsters.
Attach the shapes to the bandanna with tape or staples. You can also attach the shapes to pipe cleaners or long strips of construction paper before attaching them to the hat—that way they’ll dangle down from the hat.
Feel free to attach any other craft supplies you have around the house such as: googly-eyes, feathers, leaves, pipe cleaners, shells, glitter, sand or pebbles. Just don’t pour fish juice on your hat like Lizzie!

Step 3: Make Monster’s Eyes

Next you’ll make the monster’s eyes that you can tape to your shirt. Cut two circles out of white paper. It’s best if they are the same size.
Here’s a tip for making the eyes the same size: Fold a piece of paper in half and then cut out the eyes so you are cutting both halves of the paper at once.
Decorate the monster’s eyes by drawing on the eyeballs. What color will they be? Will both eyes be the same color?
Humans usually have two eyes, but monsters can have as many or as few as you want. Make ten eyes or just one—it doesn’t matter since every monster is different.
Tape the eyes to a t-shirt. This looks the coolest if your shirt is a solid color. The costume looks less real if you have a picture printed on your shirt. If all of your shirts have pictures on them, you can turn one inside out. Always use tape to attach the eyes to your shirt. Never glue or staple them because that will ruin your shirt.

Step 4: Make the Monster’s Teeth

Cut large teeth out of white paper. Sharp, pointy, triangles work the best for scary monsters.
Tape the teeth to your shirt just like you did with the eyes.

Step 5: The Final Touches

Use anything you have around the house to disguise the rest of your body. For example:
* Wear a blanket over your shoulders like a cape.
* Wrap a towel around your waist like a skirt.
* Use any Halloween costumes you have in your closet.
* Stuff your shirt with small pillows so you look bigger than you are.
* Cover your hands in mittens.
* Use a belt to make a tail.

Step 6: Enjoy Being a Monster!

When you’re finally disguised as a monster, go have a snack in the kitchen, sneak around your backyard, get your parents to take a photo or have a monster party with your friends. Just don’t scare your brother or sister. (Okay, you can scare them, but don’t blame me when you get in trouble!)

Online Kids Madlibs: Christmas

Mad Libs! Jumble of pencils
Fill out these questions to generate your own silly mad libs story instantly online! (Hint: a Verb is an action. An adverb usually ends in “ly” and describes an action (like slowly). A noun is a person/place/thing. An adjective describes a person/place/thing.)

Things (plural):

Place:

Adjective:

Things that remind you of Christmas:

Person:

Adjective:

Food:

Celebrity:

Things (plural):

A Musical Instrument:


This is a silly online story that will be completed with your words. Please answer the questions below and click the generate button to read the story with your words included!

Short Kids Poem: Backward Santa

kids poem elf

One year Santa tried
to break from his routine.
That was a disaster…
you’ll soon see what I mean:

The reindeer made the toys.
The elves all pulled his sleigh.
He slept during the night,
Gave toys during the day.

He hung all of our gifts
on top of our pine tree.
He wouldn’t drink his milk
or eat a fresh cookie!

Then after that strange year,
he promised to his wife
He’d never be a backwards Clause
The rest of his long life.


Enjoy this poem?

Check out my book My Sister Steals My Toys. It contains 109 other funny poems I wrote.

Fun Kids Riddle Christmas

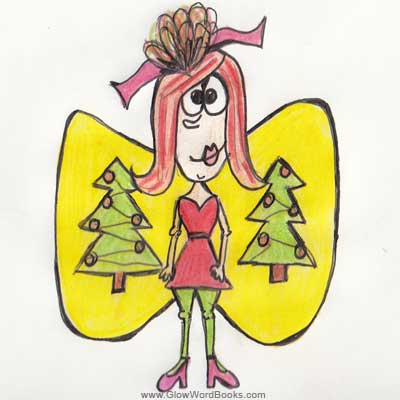
kids riddle fairy
What do fairies say on Christmas Eve?

Online Kids Madlibs: Santa

Mad Libs! Jumble of pencils
Fill out these questions to generate your own silly mad libs story instantly online! (Hint: a Verb is an action. An adverb usually ends in “ly” and describes an action (like slowly). A noun is a person/place/thing. An adjective describes a person/place/thing.)

Thing:

Animals (plural):

Adjective:

Clothes:

Food or Drinks (plural):

Place:

Foods (plural):

Color:

Phrase, Saying or Lyrics:

Toys (plural):


This is a silly online story that will be completed with your words. Please answer the questions below and click the generate button to read the story with your words included!

Short Kids Poem: Pet Store

kids poem pet elephant

I’m Danny Frankenbalm.
My store’s called “Unique Pet”.
I’ve a couple animals
I’m sure you’ve never met

I have a chicken-horse
whose beak is by its tail.
And checkered elephants
with feathers like a quail.

I also sell square snakes
that have a bright blue horn
They’re easy to care for
because they just eat corn.

My cats are camouflaged
to look like a car wheel
But careful with their tails:
they’re actually an eel.


Enjoy this poem?

Check out my book My Sister Steals My Toys. It contains 109 other funny poems I wrote.

How to Make Sugar Cookie Envelopes

Sugar Cookie Envelopes

If you just read Dax and Zippa’s Great Mail Mix-Up, you probably want to make envelope sugar cookies, just like the Zickerton Bakery!

Most families already have their favorite sugar cookie recipe. But if you don’t, you can either buy pre-made dough or use our recipe. Skip to “Making the Cookies” if you already have a recipe.

Sugar Cookie Recipe

1/2 cup Butter (100 grams)
1/2 cup Sugar
1 Egg
1 1/4 cups Flour
1/4 teaspoon Baking Soda
1/4 teaspoon Nutmeg
1/2 teaspoon Cream of Tartar
1/4 teaspoon Salt
1/2 teaspoon Vanilla

Mix dough. Bake at 350F (180C) degrees for 6-8 minutes.

Making the Cookies

Start by washing your hands. Trust me, you’ll want to.

Prepare the sugar cookie dough according to your recipe and heat up the oven.

Form the dough into rectangle cookies instead of making circular ones. I like cookies that are twice as long as they are tall. You can roll the dough out and use a rectangle cookie cutter, but it’s just as fun to form the dough with your hands. I put a big spoon of dough on the cookie sheet and then squish it into a rectangle with my hands. (I told you you’d want clean hands!) Just make sure the cookies are all the same thickness because that helps them cook better.

Bake the cookies according to the recipe and let them cool. This is a good time to trick your brother or sister into doing the dishes.

Decorating the Cookies

Prepare the frosting. If you don’t have a good frosting recipe, don’t worry because it’s easy to make frosting with powdered sugar.

1. Put one cup of Powdered Sugar in a bowl.
2. Add water VERY slowly. (I mean very slowly. I usually turn the kitchen faucet on so it is dripping and then hold the bowl under the faucet).
3. As you add water, keep stirring until you have a nice, thick frosting. If the frosting is too thick you won’t be able to squeeze it. If it’s too thin you can always add more powdered sugar to make it thicker.

Add color to the frosting (optional). If you want colored frosting, add a few drops of food coloring and stir it in. Just be careful since food coloring can stain your clothes. Dax’s favorite color is blue, but any color will work.

Put the frosting in a zip-lock bag with a spoon. Squeeze any air out of the bag and zip it back up.

Cut a tiny corner off the bottom of the bag. You’ll be squeezing frosting out of this hole. The smaller you make it, the more precise you can draw with your frosting.

Decorate the cookies. This is where you can let your creativity shine! There’s no right or wrong way to draw an envelope so feel free to try anything. Squeeze the frosting out of the bag onto the cookies.

There are two basic envelope designs you can follow. The first is to make the back of the envelope. Squeeze frosting in a big rectangle around the edge of the cookie. Then draw a triangle for the flap of the envelope.

You can also decorate the cookies like the front of an envelope. The middle of the envelope is where you write the name of the person you are mailing it to. In the middle of your cookie, write someone’s name or make squiggly lines that look like writing. In the upper right corner, design your own stamp. Stamps are often square, but you can make any designs you want.

Hope you enjoy!

Fun Kids Riddle: Elephant

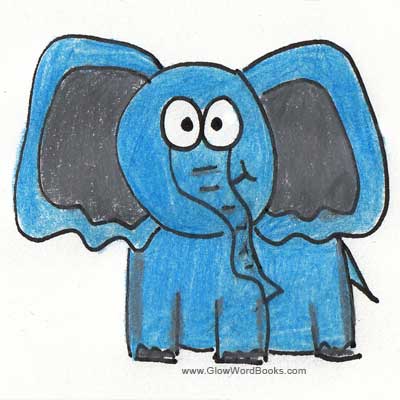
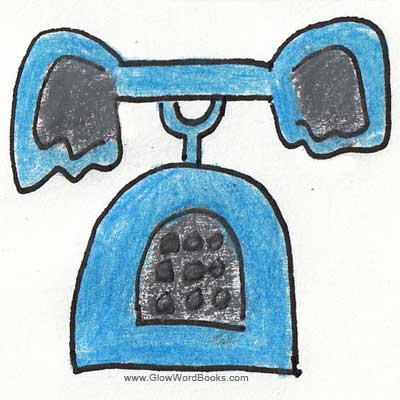
fun kids riddle elephant
How do elephants communicate?